Table of Contents
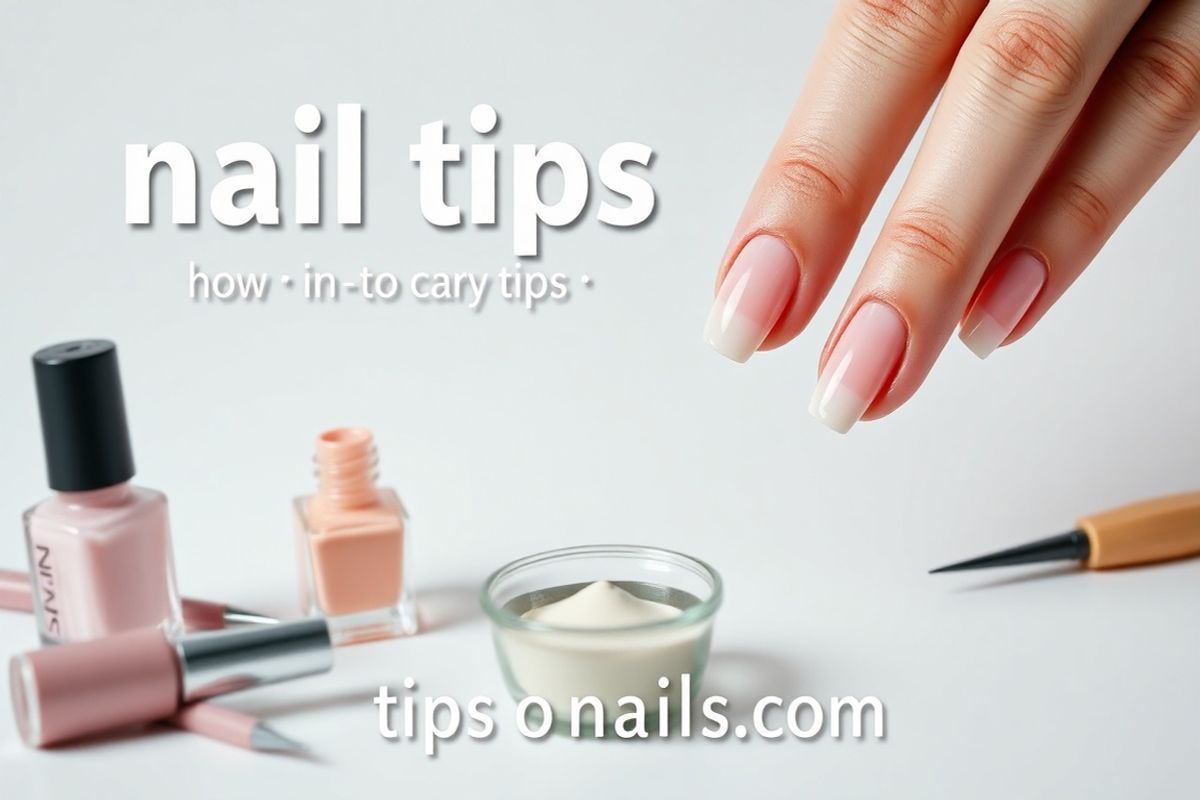
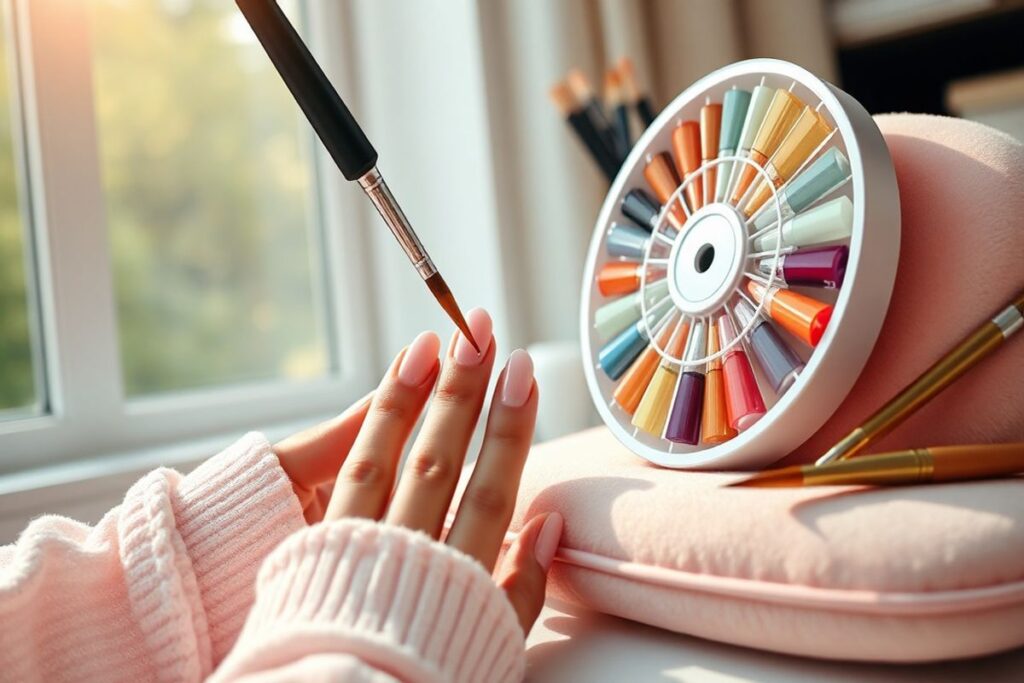
As a beauty enthusiast, having well-groomed and stylish nails is a top priority. One of the most effective ways to achieve salon-quality nails at home is by using nail tips. Nail tips are a great way to add length, strength, and style to your natural nails, and with the right nail care tips, you can keep them looking great for weeks to come. However, applying nail tips can seem intimidating, especially for those who are new to nail care. That’s why it’s essential to know how to apply nail tips correctly, as well as how to care for them to ensure a long-lasting and beautiful finish. In this blog post, we’ll share essential nail tips and nail care tips, including a step-by-step guide on how to apply nail tips at home, to help you achieve the perfect nail look. Whether you’re a seasoned nail artist or a beginner, these nail tips and tricks will help you to take your nail game to the next level and keep your nails looking healthy, strong, and stylish. So, if you’re ready to learn the secrets of beautiful and long-lasting nails, keep reading to discover the ultimate guide to nail tips, nail care, and how to apply nail tips like a pro.
Introduction to Nail Tips and Care
Importance of Nail Care for Beauty Enthusiasts
As a beauty enthusiast, you understand the significance of nail care in completing your overall aesthetic. With a plethora of nail tips and trends available, it’s easy to get caught up in the latest fashions, but neglecting the fundamentals of nail care can lead to a multitude of problems. Healthy nails are the foundation of any great nail look, and investing time in their care can make all the difference.
Understanding Nail Health
To achieve healthy nails, it’s essential to understand the importance of moisture balance and nail hygiene. Here are some key tips to keep in mind:
- Keep your nails and cuticles moisturized with a nourishing oil or cream
- Avoid excessive exposure to water or harsh chemicals
- Practice good nail hygiene by washing your hands regularly and avoiding sharing nail care tools
By following these simple steps, you can help prevent common nail problems like dryness, brittleness, and fungal infections.
The Role of Nail Tips in Beauty
Nail tips can be a great way to enhance your natural nail beauty, but they require proper care and maintenance to look their best. Here’s a step-by-step guide to applying nail tips:
- Prepare your natural nail by cleaning and shaping it
- Select the right nail glue and apply it to the back of the nail tip
- Attach the nail tip to your natural nail, starting at the center and working your way out
- Finish by shaping and filing the nail tip to blend it seamlessly with your natural nail
For inspiration on how to style your nail tips, check out our article on gold nails, which showcases the versatility and elegance of this timeless trend.
Common Nail Care Mistakes
Even with the best intentions, it’s easy to make mistakes when it comes to nail care. Here are some common errors to avoid:
- Using nail polish removers that are too harsh or contain acetone
- Not letting your nails breathe between polish applications
- Failing to moisturize your cuticles and nails regularly
By being mindful of these potential pitfalls, you can help keep your nails healthy and strong.
In conclusion, nail care is a crucial aspect of any beauty routine, and investing time in its maintenance can have a significant impact on the overall health and appearance of your nails. By following these tips and avoiding common mistakes, you can achieve the beautiful nails you’ve always wanted and enjoy a lifetime of nail beauty.
Common Nail Problems and How to Prevent Them
Nail care is an essential part of any beauty routine, and nail tips can be a great way to enhance the appearance of your nails. However, many people experience common nail problems that can be frustrating and difficult to deal with. From brittle nails to fungal infections, these issues can be prevented with the right techniques and nail care tips.
Nail Brittleness and Breakage
One of the most common nail problems is brittleness and breakage. This can be caused by a variety of factors, including nutritional deficiencies, excessive exposure to water, and using nail polish removers that contain harsh chemicals. To prevent brittle nails, make sure to:
- Eat a balanced diet that includes foods rich in biotin, vitamin E, and omega-3 fatty acids
- Avoid using nail polish removers that contain acetone or other harsh chemicals
- Wear gloves when washing dishes or engaging in other activities that involve exposure to water
Fungal Infections and Other Nail Issues
Fungal infections are another common nail problem that can be difficult to treat. These infections can cause thickening, discoloration, and brittleness of the nail. To prevent fungal infections, make sure to:
- Keep your nails clean and dry
- Avoid sharing nail care tools or equipment
- Wear shoes that fit properly and are made of breathable materials
You can also check out 5 ways chrome nail polish transforms your nails for a luxe look for more information on how to keep your nails looking their best.
Nail Care Routine
Establishing a regular nail care routine can help prevent many common nail problems. This can include:
- Trimming and filing your nails regularly
- Using a nail strengthening base coat
- Applying a moisturizing cuticle oil
By following these tips and using the right nail care products, you can help keep your nails healthy and strong.
Troubleshooting Common Nail Issues
If you do experience a nail problem, there are many ways to troubleshoot and fix the issue. For example, if you have a nail break, you can use a nail glue to repair it. If you have a fungal infection, you can try using an antifungal cream or ointment. By taking the right steps and using the right nail care tips, you can help keep your nails looking their best.
In conclusion, common nail problems can be prevented with the right techniques and nail care tips. By establishing a regular nail care routine, eating a balanced diet, and avoiding harsh chemicals, you can help keep your nails healthy and strong. Remember to always prioritize your nail health and take the necessary steps to prevent common nail problems.
Brief Overview of Nail Tips and Their Benefits
Nail tips are a popular beauty trend that can instantly elevate your nail game, offering a versatile and convenient way to achieve salon-quality nails at home. With the right application and care, nail tips can provide a long-lasting and durable finish that is both stylish and practical.
Introduction to Nail Tips
Nail tips are made from a variety of materials, including acrylic, gel, and fiberglass. Each type of nail tip has its own unique characteristics and benefits, ranging from high-gloss finishes to long-wearing durability. To choose the right nail tip for your needs, consider factors such as nail shape, nail size, and personal style.
Here are some key benefits of using nail tips:
- Easy to apply and remove
- Versatile and can be used to create a variety of nail art designs
- Long-lasting and can last for up to two weeks with proper care
- Durable and can withstand daily wear and tear
Types of Nail Tips
There are several types of nail tips available, each with its own unique characteristics and benefits. For example, acrylic nail tips are known for their high-gloss finish and long-wearing durability, while gel nail tips are prized for their flexibility and ease of application. To learn more about the different types of nail tips and how to choose the right one for your needs, check out our guide to gold nails.
Application and Care
To get the most out of your nail tips, it’s essential to follow a few simple steps:
- Prepare your natural nails by cleaning and shaping them
- Apply the nail tip, using a special adhesive to secure it in place
- Finish the look by shaping and filing the nail tip to create a smooth and even surface
Troubleshooting Common Issues
Despite their many benefits, nail tips can sometimes be prone to lifting or separation. To troubleshoot these common issues, try using a nail glue to reattach the nail tip, or reapplying a new nail tip altogether. With a little practice and patience, you can achieve a salon-quality finish that is both beautiful and long-lasting.
In conclusion, nail tips are a convenient and versatile way to elevate your nail game, offering a long-lasting and durable finish that is both stylish and practical. By following a few simple steps and choosing the right type of nail tip for your needs, you can achieve a beautiful and professional-looking finish that is sure to turn heads.
Purpose of the Blog Post: Providing Essential Nail Tips
As we delve into the world of nail care, it’s essential to understand the significance of nail tips in achieving a polished and professional look. With the right techniques and tools, anyone can become a nail expert, and that’s precisely what this blog post aims to provide – essential nail tips to elevate your beauty routine.
Understanding the Basics of Nail Care
To get started with nail tips, it’s crucial to understand the basics of nail care. This includes cleaning and shaping your nails, selecting the right nail polish, and using the appropriate tools. For instance, when applying nail tips, it’s essential to use a high-quality nail glue that dries quickly and lasts long. Here are some tips to keep in mind:
- Use a nail file to shape your nails before applying nail tips
- Choose a nail polish that complements your skin tone
- Apply a base coat to protect your nails from staining
Advanced Nail Tip Techniques
For those looking to take their nail game to the next level, there are several advanced techniques to explore. One such technique is using chrome nail polish to create a luxurious look. As seen in this article on 5 ways chrome nail polish transforms your nails for a luxe look, chrome nail polish can add a touch of elegance to any nail design. To achieve this look, follow these steps:
- Apply a base coat to your nails
- Use a chrome nail polish to create a metallic finish
- Seal with a top coat to lock in the color
Troubleshooting Common Nail Problems
Despite the best efforts, common nail problems like brittle nails or nail breakage can occur. To address these issues, it’s essential to use the right tools and techniques. For example, using a nail strengthener can help to fortify weak nails. Here are some additional tips to keep in mind:
- Use a nail moisturizer to keep your nails hydrated
- Avoid using nails as tools to prevent breakage
- Apply a nail hardener to strengthen weak nails
In conclusion, this section has provided an overview of the essential nail tips and techniques to achieve a professional look. By following these tips and exploring advanced techniques, readers can take their nail game to the next level and achieve a polished, elegant finish. With practice and patience, anyone can become a nail expert, and we encourage you to continue exploring the world of nail care to discover new techniques and trends.
Preparing for Nail Tip Application

Choosing the Right Nail Tips for Your Nail Type
When it comes to nail tips, selecting the right ones for your nail type is crucial for a flawless and long-lasting finish. With so many options available, it can be overwhelming to choose the perfect nail tips that cater to your unique nail needs. In this section, we’ll explore the different types of nail tips and how to choose the right ones for your nail type.
Choosing the Right Material
The material of your nail tips can greatly impact the overall look and feel of your nails. You can choose from a variety of materials, including acrylic, gel, and fiberglass. Each material has its own set of advantages and disadvantages. For example, acrylic nail tips are durable and long-lasting, but can be heavy and damaging to your natural nails. On the other hand, gel nail tips are lightweight and easy to apply, but may not be as durable as acrylic.
To choose the right material for your nail tips, consider the following factors:
- Your lifestyle: If you have a busy lifestyle, you may prefer nail tips that are easy to apply and remove.
- Your nail type: If you have weak or brittle nails, you may prefer nail tips that are lightweight and gentle on your nails.
- Your personal style: If you want a more natural look, you may prefer nail tips that are made from fiberglass or gel.
Measuring Your Nail Tips
Measuring your nail tips is crucial to ensure a proper fit. Here’s a step-by-step guide to measuring your nail tips:
- Measure the length of your natural nail from the cuticle to the tip.
- Measure the width of your natural nail from one side to the other.
- Choose nail tips that are slightly larger than your natural nail to ensure a comfortable fit.
For more information on measuring your nail tips, check out our article on gold nails, which provides tips and tricks for achieving a flawless nail tip application.
Tips for Applying Nail Tips
Applying nail tips can be a bit tricky, but with the right techniques, you can achieve a professional-looking finish. Here are some tips to keep in mind:
- Always clean and prepare your natural nail before applying nail tips.
- Use a high-quality nail glue that is specifically designed for nail tips.
- Apply a thin layer of nail glue to the back of the nail tip and attach it to your natural nail.
Conclusion
In conclusion, choosing the right nail tips for your nail type is essential for a beautiful and long-lasting finish. By considering the material, measuring your nail tips, and following the right application techniques, you can achieve a professional-looking finish that enhances your natural beauty. With the right nail tips, you can take your nail game to the next level and enjoy a flawless finish that lasts.
Preparing Your Nails for Tip Application: Cleaning and Shaping
Preparation is key when it comes to applying nail tips, and one of the most crucial steps is cleaning and shaping your natural nails. This process lays the foundation for a successful application, ensuring a strong bond between the nail tip and your natural nail. By following the right techniques, you can achieve a flawless finish that enhances the overall appearance of your nail care.
Cleaning the Nail Surface
To begin, you’ll need to clean the surface of your nails using a nail cleanser or acetone. This step is essential for removing any oils or residue that may interfere with the adhesive. Here’s a step-by-step guide to cleaning your nails:
- Dip a cotton swab in nail cleanser or acetone.
- Gently rub the swab over the surface of your nail, making sure to cover the entire area.
- Use a lint-free wipe to remove any excess cleanser or residue.
Shaping the Nail
Once your nails are clean, it’s time to shape them. This involves gently filing the nail to create a smooth surface for the tip to adhere to. Some key things to keep in mind when shaping your nails include:
- Using a nail file with a gentle grit to avoid damaging the nail
- Filing in one direction only to prevent splitting or tearing
- Shaping the nail to fit the curve of the nail tip
For inspiration on how to style your nails after applying tips, check out our exclusive designs, such as the ones featured in Magnolia Nails: Exclusive Designs That Stole the Show.
Tips for a Successful Application
To ensure a successful application, it’s essential to follow some key tips:
- Use a high-quality nail glue that is specifically designed for nail tip application
- Apply a small amount of glue to the back of the nail tip and attach it to the natural nail
- Hold the nail tip in place for a few seconds to secure the bond
Troubleshooting Common Issues
If you encounter any issues during the application process, don’t panic. Here are some common problems and solutions:
| Issue | Solution |
|---|---|
| Nail tip not adhering | Check that the nail surface is clean and dry, and try using a different type of glue |
| Nail tip lifting | Apply more glue to the back of the nail tip and reattach it to the natural nail |
In conclusion, preparing your nails for tip application is a crucial step in achieving a flawless finish. By following the right techniques and using high-quality products, you can ensure a strong bond between the nail tip and your natural nail. With these tips and tricks, you’ll be well on your way to creating beautiful, long-lasting nail tips that enhance your overall nail care routine.
Selecting the Right Nail Glue and Adhesives
When it comes to nail tips, the right adhesive can make all the difference in ensuring a long-lasting and secure application. With so many options available, choosing the right nail glue can be overwhelming, especially for those new to nail care. In this section, we’ll explore the importance of selecting the right adhesive for your nail tips and provide guidance on how to make the best choice.
Understanding Nail Glue Types
There are several types of nail glues available, each with its own unique characteristics and benefits. Cyanoacrylate glues, for example, are known for their fast-drying properties and are often used for nail tip application. However, they can be brittle and prone to cracking. On the other hand, ethyl cyanoacrylate glues are more flexible and suitable for use with nail wraps or nail overlays. When choosing a nail glue, consider the following factors:
- Drying time
- Flexibility
- Adhesive strength
- Chemical composition
Tips for Applying Nail Glue
To ensure a strong and lasting bond, it’s essential to apply nail glue correctly. Here’s a step-by-step guide:
- Prepare the nail surface: Clean and shape the nail to create a smooth surface for application.
- Apply a small amount of glue: Use a nail glue brush to apply a small amount of adhesive to the nail tip.
- Attach the nail tip: Carefully place the nail tip onto the nail, making sure to align it properly.
- Hold in place: Hold the nail tip in place for a few seconds to allow the glue to set.
For a more luxurious look, consider adding a chrome nail polish finish to your nail tips. You can learn more about the benefits of chrome nail polish and how to apply it in our article 5 ways chrome nail polish transforms your nails for a luxe look.
Troubleshooting Common Issues
If you’re experiencing issues with your nail glue, such as lifting or separation, it may be due to incorrect application or poor adhesive quality. To troubleshoot, try the following:
- Reapply a small amount of glue to the affected area
- Use a nail glue primer to improve adhesion
- Avoid using nail glue on oily or dirty nails
In conclusion, selecting the right nail glue and adhesives is crucial for a successful nail tip application. By understanding the different types of nail glues, following proper application techniques, and troubleshooting common issues, you can achieve a long-lasting and beautiful nail tip finish. With the right adhesive and a little practice, you’ll be on your way to creating stunning nail art designs that will make your friends and family envy your nail care skills.
Tips for Measuring and Sizing Your Nail Tips
Getting the perfect fit for your nail tips is crucial for a flawless and long-lasting finish. Measuring and sizing your nail tips accurately can make all the difference in achieving a professional-looking result. Whether you’re a beginner or an experienced nail enthusiast, understanding how to measure and size your nail tips is essential for a successful application.
Measuring Your Natural Nails
To measure your natural nails, start by using a nail tip sizing chart or a ruler to determine the length and width of each nail. Here’s a step-by-step process to follow:
- Place the ruler or sizing chart along the center of your nail to determine the length.
- Measure the width of your nail by placing the ruler or sizing chart across the nail bed.
- Record your measurements to ensure you order the correct size of nail tips.
Choosing the Right Size of Nail Tips
When choosing the right size of nail tips, consider the shape and size of your natural nails. Here are some tips to keep in mind:
- Measure your natural nails accurately to ensure a perfect fit.
- Consider the shape of your nail bed and choose a nail tip that complements it.
- If you’re unsure about the size, it’s always better to opt for a slightly smaller size to avoid overwhelming your natural nail.
For inspiration on how to style your nails with your new nail tips, check out our article on trendy nail art designs you’ll love to try. You can find a variety of designs and techniques to enhance your nail beauty and make your nail tips stand out.
Sizing Chart and Measurement Conversion
If you’re using a nail tip sizing chart, make sure to understand the measurement conversion. Here’s a breakdown of the common measurements:
| Size | Length | Width |
|---|---|---|
| Small | 10mm | 6mm |
| Medium | 12mm | 8mm |
| Large | 14mm | 10mm |
Troubleshooting Common Sizing Issues
If you’re experiencing common sizing issues, such as nail tips that are too loose or too tight, here are some troubleshooting tips:
- Check your measurements to ensure accuracy.
- Adjust the size of your nail tips accordingly.
- Consider using a different type of nail tip or adhesive to achieve a better fit.
In conclusion, measuring and sizing your nail tips accurately is crucial for a successful application. By following these tips and techniques, you can achieve a flawless and long-lasting finish. Remember to always measure your natural nails accurately and choose the right size of nail tips to ensure a perfect fit. With practice and patience, you’ll be a pro at applying nail tips in no time.
Step-by-Step Guide to Applying Nail Tips
Applying Nail Tips: A Beginner’s Guide
Applying nail tips can seem daunting, but with the right guidance, you can achieve a salon-quality finish at home. As a beginner, it’s essential to understand the basics of nail tip application, from preparation to finishing touches. In this section, we’ll delve into the world of nail care and explore the techniques required to apply nail tips like a pro.
Preparing Your Nails
Before applying nail tips, it’s crucial to prepare your natural nails. This involves cleaning and shaping your nails to ensure a smooth surface for the tip to adhere to. Use a nail file to gently shape your nails, and a nail cleanser to remove any oils or residue.
- Use a nail brush to remove any dirt or debris
- Wipe your nails with a lint-free wipe
- Apply a small amount of nail glue to the back of the tip
Applying the Nail Tip
To apply the nail tip, follow these steps:
- Select the correct size of nail tip for your natural nail
- Apply a small amount of nail glue to the back of the tip
- Place the tip onto your natural nail, starting at the center and gently pressing outward
- Hold the tip in place for a few seconds to secure it
Shaping and Filing
Once the nail tip is applied, use a nail file to shape and smooth out the edge. Be careful not to file too aggressively, as this can cause the tip to lift. For inspiration on nail art designs, check out our article on Trendy Nail Art Designs You’ll Love to Try.
Finishing Touches
To complete the look, apply a top coat to seal the nail tip in place. This will help prevent the tip from lifting and add a glossy finish to your nails.
- Use a cuticle oil to moisturize your cuticles
- Apply a nail strengthener to help grow your natural nails
In conclusion, applying nail tips requires patience and practice, but with the right techniques and tools, you can achieve a professional-looking finish at home. By following these steps and tips, you’ll be well on your way to becoming a nail care expert and enjoying beautiful, long-lasting nail tips.
How to Apply Nail Tips at Home: Tips and Tricks
Applying nail tips at home can be a daunting task, but with the right techniques and tools, you can achieve a salon-quality finish. Whether you’re a beginner or an experienced nail care enthusiast, mastering the art of applying nail tips is essential for a beautiful and long-lasting finish. In this section, we’ll delve into the world of nail tips and provide you with the tips and tricks you need to apply them like a pro.
Preparing Your Nails
Before applying nail tips, it’s essential to prepare your natural nails. This involves cleaning and shaping your nails to ensure a smooth and even surface. Use a nail file to gently shape your nails, and a nail cleanser to remove any oils or residue. This will help the nail glue adhere to your nails, ensuring a strong and long-lasting bond.
- Clean your nails with a nail cleanser
- Shape your nails using a nail file
- Apply a small amount of nail glue to the back of the nail tip
- Place the nail tip onto your natural nail, starting at the center and gently pressing outward
Choosing the Right Nail Glue
When it comes to applying nail tips, the right nail glue is essential. Look for a glue that is specifically designed for nail tips, and follow the instructions carefully. Some popular types of nail glue include:
- Acrylic glue
- Gel glue
- Resin glue
Each type of glue has its own unique characteristics, so be sure to choose the one that best suits your needs.
Tips for a Successful Application
To ensure a successful application, follow these tips:
- Use a nail tip that is the right size for your natural nail
- Apply a small amount of nail glue to the back of the nail tip
- Place the nail tip onto your natural nail, starting at the center and gently pressing outward
- Use a nail file to gently shape and smooth out the nail tip
For more information on nail art designs, check out our article on 5 ways chrome nail polish transforms your nails for a luxe look.
Troubleshooting Common Issues
If you encounter any issues during the application process, don’t worry! Here are some common problems and solutions:
| Problem | Solution |
|---|---|
| Nail tip not adhering to natural nail | Use more nail glue or try a different type of glue |
| Nail tip too large or too small | Choose a different size nail tip |
| Nail tip lifting or separating | Use a nail file to gently shape and smooth out the nail tip |
In conclusion, applying nail tips at home requires patience, practice, and the right techniques. By following these tips and tricks, you can achieve a beautiful and long-lasting finish. Remember to choose the right nail glue, prepare your natural nails, and use a nail file to gently shape and smooth out the nail tip. With these tips, you’ll be well on your way to becoming a nail care expert and achieving the nail tips of your dreams.
Common Mistakes to Avoid When Applying Nail Tips
Applying nail tips can be a bit tricky, and even the most experienced beauty enthusiasts can make mistakes. However, with the right guidance, you can avoid common pitfalls and achieve a salon-quality finish at home. In this section, we’ll explore the most frequent mistakes to watch out for when applying nail tips, so you can ensure a flawless and long-lasting result.
Incorrect Nail Preparation
Before applying nail tips, it’s essential to prepare your natural nails properly. This includes cleaning and shaping your nails to create a smooth surface for the tip to adhere to. Failure to do so can result in a weak bond between the nail and the tip, leading to premature lifting or detachment. To avoid this, make sure to:
- Clean your nails with a lint-free wipe and nail cleanser
- Shape your nails to your desired shape, taking care not to file too short
- Use a buffer to gently roughen the surface of your nail
Insufficient Adhesive
Using insufficient adhesive can also lead to a weak bond between the nail and the tip. To ensure a strong and long-lasting bond, follow these steps:
- Apply a small amount of adhesive to the back of the nail tip
- Place the tip onto your natural nail, starting at the center and gently pressing outward
- Hold the tip in place for a few seconds to allow the adhesive to set
For more information on achieving a stunning nail finish, check out our article on Gold Nails: 10 Stunning Reasons Your Polish Today.
Improper Tip Sizing
Improperly sizing your nail tips can lead to a number of problems, including lifting, detachment, and uneven wear. To avoid this, make sure to:
- Measure your natural nail to determine the correct size of nail tip to use
- Choose a nail tip that is slightly curved to match the natural shape of your nail
- Use a nail tip that is made from high-quality materials, such as acrylic or gel
Inadequate Finishing
Finally, inadequate finishing can leave your nail tips looking uneven, rough, or unfinished. To avoid this, make sure to:
| Step | Description |
|---|---|
| 1 | Use a nail file to gently shape and smooth the tip |
| 2 | Apply a layer of top coat to seal and protect the tip |
| 3 | Finish with a cuticle oil or cream to hydrate and nourish your nails and cuticles |
In conclusion, applying nail tips requires attention to detail and a bit of practice to get it right. By avoiding common mistakes and following the right techniques, you can achieve a beautiful, long-lasting finish that will leave your nails looking stunning. Remember to take your time, be patient, and don’t be afraid to experiment and try new things – with a little practice, you’ll be a pro at applying nail tips in no time!
Finishing Touches: Shaping and Filing Your Nail Tips
The final stage of applying nail tips is where the magic happens, transforming your look from basic to breathtaking. With the right techniques and tools, you can achieve a flawless finish that elevates your entire beauty routine. In this section, we’ll delve into the art of shaping and filing your nail tips, exploring the essential steps to create a stunning, long-lasting finish.
Shaping Your Nail Tips
To shape your nail tips, start by selecting the right file. A nail file with a gentle grit is ideal for shaping and smoothing out the tip. Here’s a step-by-step guide:
- Hold the file at a 45-degree angle to the nail.
- Gently move the file back and forth, shaping the tip to your desired shape.
- Repeat the process for each nail, taking care not to file too aggressively.
Filing and Smoothing
Filing is an essential step in achieving a smooth, even finish. Use a nail buffer to gently buff the nail surface, removing any ridges or imperfections. For a more intricate design, consider visiting 10 stunning reasons to try gold nails today for inspiration.
- Key filing techniques include:
- Using a light touch to avoid damaging the nail
- Filing in one direction only to prevent scratching
- Buffing the nail surface to create a high-gloss finish
Troubleshooting Common Issues
When shaping and filing your nail tips, it’s not uncommon to encounter issues like unevenness or ridges. To address these problems, try the following:
| Issue | Solution |
|---|---|
| Unevenness | Use a nail file to gently shape and smooth the nail surface |
| Ridges | Apply a nail strengthener to help fortify the nail |
Tips for a Long-Lasting Finish
To ensure your nail tips last as long as possible, follow these quick tips:
- Apply a top coat to seal and protect the nail
- Avoid using harsh chemicals or detergents
- Moisturize your cuticles and nails regularly
In conclusion, shaping and filing your nail tips is an art that requires patience, practice, and the right techniques. By following these steps and tips, you’ll be able to achieve a stunning, long-lasting finish that elevates your beauty routine. Remember to stay tuned for more nail care tips and tricks to keep your nails looking their best.
Nail Care Tips for Long-Lasting Nail Tips
Daily Nail Care Routine for Beauty Enthusiasts
As a beauty enthusiast, maintaining healthy and beautiful nails is crucial, and a daily nail care routine can make all the difference. By incorporating simple yet effective steps into your daily routine, you can keep your nails looking great and prevent common problems like breakage, brittleness, or fungal infections. With the right nail tips and care, you can achieve salon-quality nails at home.
Understanding the Importance of Nail Hygiene
To start your daily nail care routine, it’s essential to understand the importance of nail hygiene. This includes washing your hands regularly, especially after exposure to harsh chemicals or detergents. You should also dry your nails thoroughly after washing your hands to prevent moisture from accumulating under your nails. Here are some quick tips to keep in mind:
- Wash your hands with mild soap and warm water
- Dry your nails thoroughly, paying extra attention to the areas around your cuticles
- Apply a nourishing cuticle oil to keep your cuticles hydrated and healthy
Creating a Nail Care Schedule
To maintain healthy nails, it’s crucial to create a nail care schedule that works for you. This can include setting aside time each day to moisturize your nails and cuticles, as well as scheduling regular nail appointments with a professional. Here’s a simple schedule to follow:
- Apply a nail strengthener or base coat to your nails
- Moisturize your cuticles and nails with a nourishing oil or cream
- Gently push back your cuticles to keep them healthy and tidy
- Finish with a top coat to seal in moisture and protect your nails
Exploring Nail Art and Design
If you’re looking to take your nail care routine to the next level, consider exploring nail art and design. With the help of gold nails, you can add a touch of luxury and elegance to your nails. From simple designs to intricate patterns, the possibilities are endless, and with the right nail tips and techniques, you can achieve salon-quality results at home.
Troubleshooting Common Nail Problems
Despite your best efforts, common nail problems like breakage or brittleness can still occur. To troubleshoot these issues, it’s essential to identify the underlying cause and take corrective action. Here are some common problems and their solutions:
| Problem | Solution |
|---|---|
| Breakage | Apply a nail strengthener or base coat to your nails |
| Brittle nails | Moisturize your nails and cuticles with a nourishing oil or cream |
| Fungal infections | Consult a professional for treatment and advice |
In conclusion, a daily nail care routine is essential for maintaining healthy and beautiful nails. By following these simple steps and incorporating the right nail tips and techniques, you can achieve salon-quality nails at home and keep your nails looking great. Remember to stay consistent, be patient, and don’t hesitate to seek professional advice if you encounter any problems. With the right care and attention, your nails will thank you.
How to Keep Your Nail Tips Looking Great: Maintenance Tips
To keep your nail tips looking great, it’s essential to establish a consistent maintenance routine. With the right techniques and products, you can extend the life of your nail tips and maintain their appearance. Whether you’re a seasoned beauty enthusiast or a newcomer to the world of nail care, learning how to properly care for your nail tips is crucial for achieving a salon-quality finish.
Cleaning and Hygiene
Proper cleaning and hygiene are vital for maintaining healthy and beautiful nail tips. To keep your nail tips clean, follow these steps:
- Wash your hands regularly, especially after applying nail polish or handling chemicals.
- Use a gentle nail cleanser to remove dirt and oils from the surface of your nail tips.
- Dry your hands thoroughly, paying extra attention to the areas around your nail tips.
- Use a lint-free wipe or cotton ball to gently remove any excess moisture.
- Avoid using harsh chemicals or abrasive materials that can damage your nail tips.
Moisturizing and Nourishment
Moisturizing and nourishing your nail tips is essential for maintaining their health and appearance. Apply a nail oil or cream to your nail tips and cuticles regularly, ideally after washing your hands or taking a shower. This will help to lock in moisture and protect your nail tips from dryness and brittleness. For an added touch of luxury, consider trying gold nails for a stunning and long-lasting finish.
Avoiding Damage and Repair
To avoid damaging your nail tips, be gentle when washing dishes, cleaning, or engaging in activities that can cause wear and tear. If you do happen to damage your nail tips, don’t worry – there are several repair options available. You can use a nail glue to reattach a loose nail tip or apply a nail strengthener to help repair and fortify your natural nail.
Regular Maintenance
Regular maintenance is key to keeping your nail tips looking great. Set aside time each week to inspect your nail tips, clean, and moisturize them. By following these simple steps, you can extend the life of your nail tips and maintain their appearance. Remember to be patient and gentle when caring for your nail tips, as they can be delicate and prone to damage.
In conclusion, maintaining your nail tips requires a combination of proper cleaning, moisturizing, and regular maintenance. By following these tips and establishing a consistent routine, you can keep your nail tips looking great and extend their lifespan. Take the first step towards achieving healthy and beautiful nail tips – start your maintenance routine today and enjoy the benefits of stunning, salon-quality nails.
Tips for Strengthening Your Natural Nails
Strengthening your natural nails is a crucial step in achieving healthy and beautiful nail tips. With the right techniques and ingredients, you can say goodbye to brittle and weak nails and hello to strong and resilient ones. In this section, we’ll explore the best tips for strengthening your natural nails, from using nourishing oils to avoiding harsh chemicals.
Nourishing Your Nails with Oils
To strengthen your natural nails, it’s essential to keep them moisturized and nourished. Cuticle oil and nail oil are great options, as they contain ingredients like vitamin E and jojoba oil that help to hydrate and protect your nails. Here are some tips for using oils to strengthen your nails:
- Apply a small amount of oil to your nails and cuticles daily
- Massage the oil into your nails and cuticles to increase blood flow
- Use a nail brush to apply the oil and remove any excess
Avoiding Harsh Chemicals
Harsh chemicals can weaken and damage your natural nails, making them more prone to breakage. To avoid this, try to limit your use of nail polish removers and acrylic nails. Instead, opt for natural nail polish and nail strengthening treatments. For example, you can try using a nail strengthening base coat to help fortify your nails. If you’re looking for inspiration for your next manicure, check out our article on nail dashes for some stylish and strengthening ideas.
Using Nail Strengthening Treatments
Nail strengthening treatments can be a great way to fortify your natural nails and prevent breakage. Here are some steps to follow when using a nail strengthening treatment:
- Apply a nail strengthening base coat to your nails
- Follow the instructions on the treatment for the recommended application time
- Repeat the treatment as needed to achieve the desired results
Maintaining Good Nail Hygiene
Good nail hygiene is essential for maintaining strong and healthy nails. This includes washing your hands regularly, drying your hands thoroughly, and avoiding biting or picking at your nails. By following these tips, you can help to prevent breakage and keep your nails looking their best.
In conclusion, strengthening your natural nails requires a combination of nourishing ingredients, avoiding harsh chemicals, and maintaining good nail hygiene. By following these tips, you can achieve strong and beautiful nails that will make your nail tips look their best. Remember to stay consistent and patient, as strengthening your natural nails takes time and effort. With the right techniques and ingredients, you can say goodbye to weak and brittle nails and hello to a healthy and beautiful nail care routine.
How to Repair and Fix Damaged Nail Tips
Damaged nail tips can be a frustrating experience, especially when you’ve invested time and effort into applying them. However, with the right techniques and tools, you can repair and fix damaged nail tips to extend their wear and maintain a salon-quality finish. In this section, we’ll explore the various methods for repairing damaged nail tips, including nail tip repair kits and nail glue.
Identifying the Type of Damage
To repair damaged nail tips, it’s essential to identify the type of damage. Is the nail tip lifting, or is it cracked? Once you’ve determined the type of damage, you can choose the best course of action. For example, if the nail tip is lifting, you can use nail glue to reattach it. Here are some common types of damage and their corresponding repair methods:
- Lifting: use nail glue to reattach the nail tip
- Cracking: use a nail file to smooth out the crack and apply a nail strengthener
- Breaking: use a nail tip repair kit to replace the broken nail tip
Using Nail Tip Repair Kits
Nail tip repair kits are a great way to fix damaged nail tips. These kits usually include a nail tip replacement, nail glue, and a nail file. To use a nail tip repair kit, follow these steps:
- Prepare the nail by cleaning and shaping it
- Apply a small amount of nail glue to the back of the nail tip replacement
- Attach the nail tip replacement to the nail
- Use a nail file to shape and smooth out the nail tip
For more information on trendy nail art designs, check out our article on Trendy Nail Art Designs You’ll Love to Try. This article features a range of designs, from simple to complex, and provides tips and tricks for creating beautiful nail art.
Troubleshooting Common Repair Issues
When repairing damaged nail tips, it’s common to encounter issues such as nail glue not adhering or the nail tip not fitting properly. To troubleshoot these issues, try the following:
| Issue | Solution |
|---|---|
| Nail glue not adhering | Use a nail glue primer to help the glue adhere |
| Nail tip not fitting properly | Use a nail file to shape the nail tip to fit the nail |
In conclusion, repairing damaged nail tips requires patience, skill, and the right techniques. By following the methods outlined in this section, you can extend the wear of your nail tips and maintain a salon-quality finish. Remember to always use nail glue and nail files carefully, and to follow the instructions provided with your nail tip repair kit. With practice and experience, you’ll become a pro at repairing damaged nail tips and achieving beautiful, long-lasting results.
Advanced Nail Tip Techniques and Trends
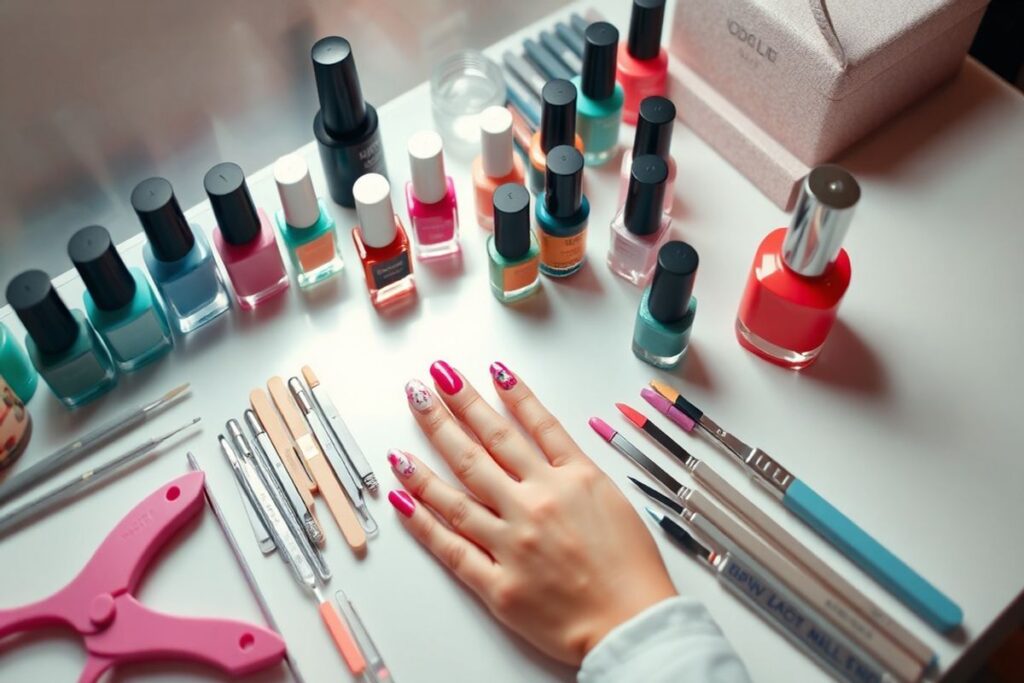
Nail Art Designs for Nail Tips: Inspiration and Ideas
Nail tips have become a staple in the beauty world, and with the rise of nail art, the possibilities are endless. From intricate designs to bold statements, nail tips can be transformed into miniature masterpieces. With a little creativity and inspiration, you can take your nail tips to the next level and make a statement with your beauty look.
Introduction to Nail Art Designs
Nail art is an art form that involves decorating your nails with various designs, patterns, and techniques. When it comes to nail tips, the design possibilities are vast. You can opt for classic French tips, bold stripes, or intricate floral patterns. To get started, you’ll need a few basic tools, including:
- A nail polish of your choice
- A nail art brush
- A dotting tool
- A nail polish remover
Here’s a step-by-step guide to creating a simple nail art design:
- Prep your nail by applying a base coat and letting it dry.
- Apply a thin layer of nail polish to your nail tip.
- Use a nail art brush to create your design.
- Finish with a top coat to seal in your design.
Advanced Nail Art Techniques
For more advanced nail art techniques, you can try using chrome nail polish to create a luxurious, high-gloss finish. As seen in 5 ways chrome nail polish transforms your nails for a luxe look, chrome nail polish can add a touch of sophistication to any nail art design. To create a chrome finish, you’ll need:
- A chrome nail polish
- A nail polish remover
- A nail art brush
- A top coat
Nail Art Inspiration
For inspiration, you can look to social media, nail art blogs, or even nature. Some popular nail art designs include:
- Geometric patterns
- Floral patterns
- Abstract designs
- Seasonal themes
Tips and Tricks
To create stunning nail art designs, it’s essential to have the right tools and techniques. Here are a few tips to keep in mind:
| Tool | Description |
|---|---|
| Nail art brush | Used to create intricate designs and patterns |
| Dotting tool | Used to create small dots and details |
| Nail polish remover | Used to remove nail polish and clean up mistakes |
In conclusion, nail tips can be transformed into stunning works of art with a little creativity and inspiration. Whether you’re a beginner or an advanced nail artist, there are countless designs and techniques to explore. So why not get creative and try out a new nail art design today? With practice and patience, you can create beautiful, unique nail tips that showcase your personality and style.
Using Nail Tips to Enhance Your Nail Beauty: Trends and Styles
Nail tips have revolutionized the way we approach nail beauty, offering a versatile and creative way to enhance our natural nails. With endless possibilities for design and style, nail tips have become a staple in the beauty industry, allowing individuals to express their personality and showcase their unique sense of style. Whether you’re looking to add a touch of glamour or a pop of color, nail tips are the perfect solution.
Nail Tip Designs and Trends
When it comes to nail tip designs, the options are limitless. From classic French tips to bold, glittery accents, there’s a style to suit every taste and preference. For a more sophisticated look, consider opting for a chrome nail polish finish, which can add a touch of luxury to your nails. As seen in our previous article, 5 Ways Chrome Nail Polish Transforms Your Nails for a Luxe Look, chrome polish can elevate your nail game and leave you with a stunning finish.
To achieve a salon-quality finish at home, follow these steps:
- Prep your nails by cleaning and shaping them
- Apply a base coat to protect your natural nails
- Select your desired nail tip design and apply it using a special adhesive
- Finish with a top coat to seal and protect your nail tips
Some popular nail tip designs include:
- Classic French tips
- Bold, glittery accents
- Ombre effects for a gradient look
- Geometric patterns for a modern twist
Nail Tip Materials and Quality
The quality of your nail tips can make all the difference in the longevity and appearance of your nails. Look for nail tips made from high-quality materials, such as acrylic or gel, which can provide a durable and long-lasting finish. When selecting nail tips, consider the following factors:
| Material | Durability | Cost |
|---|---|---|
| Acrylic | High | Moderate |
| Gel | High | High |
| Tip extensions | Medium | Low |
Nail Tip Application and Removal
Applying and removing nail tips requires some skill and patience, but with practice, you can achieve a salon-quality finish at home. To apply nail tips, start by prepping your natural nails and selecting the right adhesive. To remove nail tips, use a special solvent and gently pry the tip off your natural nail.
For a flawless finish, consider the following tips:
- Use a nail file to shape and smooth out your nail tips
- Apply a cuticle oil to keep your cuticles hydrated and healthy
- Avoid using harsh chemicals or excessive heat when applying or removing nail tips
In conclusion, nail tips offer a world of possibilities for enhancing your nail beauty. With the right design, material, and application technique, you can achieve a stunning and long-lasting finish that showcases your unique sense of style. Whether you’re a seasoned beauty enthusiast or just starting out, nail tips are a great way to elevate your nail game and take your beauty routine to the next level.
How to Remove Nail Tips Safely and Effectively
Removing nail tips can be a daunting task, but with the right techniques and tools, you can achieve a safe and effective removal process. Whether you’re a seasoned beauty enthusiast or a beginner, it’s essential to understand the importance of proper removal to prevent damage to your natural nails.
Preparation is Key
Before removing your nail tips, make sure to gather the necessary tools and products. You’ll need a nail glue remover, a cuticle pusher, and a nail file. It’s also crucial to choose the right nail tip remover for your nail type. For example, if you have acrylic nails, you’ll need a remover specifically designed for acrylics.
- Apply the nail glue remover to the area where the nail tip meets your natural nail.
- Gently scrape off the nail tip using a cuticle pusher.
- Use a nail file to shape and smooth out your natural nail.
Some essential tips to keep in mind:
- Use a nail glue remover that is free from harsh chemicals.
- Avoid using excessive force, which can damage your natural nail.
- Moisturize your nails and cuticles after removal to prevent dryness.
Alternative Removal Methods
If you’re looking for alternative removal methods, you can try using acetone or nail tip removers that contain acetic acid. However, be cautious when using these products, as they can be harsh on your nails and skin. For a more luxurious nail experience, consider trying chrome nail polish to give your nails a high-end look.
Troubleshooting Common Issues
If you encounter any issues during the removal process, such as nail tip breakage or glue residue, don’t panic. Simply use a nail file to gently remove any excess glue or smooth out the nail surface. For more severe issues, consider consulting a professional nail technician.
In conclusion, removing nail tips safely and effectively requires patience, care, and the right techniques. By following these steps and tips, you can achieve a successful removal and maintain healthy, beautiful nails. Remember to always prioritize your nail health and take necessary precautions to prevent damage.
Future of Nail Tips: Emerging Trends and Technologies in Nail Care
The world of nail tips is constantly evolving, with new technologies and trends emerging every season. As a beauty enthusiast, staying ahead of the curve is essential to achieve the perfect nail care look. With the rise of innovative materials and techniques, the future of nail tips has never been more exciting.
Advancements in Nail Tip Materials
The development of new materials is revolutionizing the nail tip industry. For instance, gel extensions and acrylic nails are being replaced by more durable and long-lasting options, such as fiberglass nails and silicone nail tips. These new materials offer improved flexibility and resistance to damage, making them ideal for individuals with active lifestyles. Some of the key benefits of these materials include:
- Increased durability
- Improved flexibility
- Enhanced nail strength
- Reduced risk of damage
Emerging Trends in Nail Art
Nail art is a significant aspect of nail care, and emerging trends are taking the industry by storm. From minimalist designs to 3D nail art, the possibilities are endless. To stay updated on the latest trends, visit our website for inspiration, such as the exclusive designs that stole the show at recent fashion events. Some popular nail art techniques include:
- Ombre effects
- Glitter accents
- Stamping designs
- Freehand painting
The Role of Technology in Nail Care
Technology is playing a significant role in the evolution of nail care. With the rise of nail printing and nail mapping, achieving the perfect nail tip shape and design has never been easier. These technologies enable individuals to customize their nail tips to suit their personal style and preferences. Some of the key advantages of these technologies include:
| Technology | Benefits |
|---|---|
| Nail printing | Customizable designs |
| Nail mapping | Precise shape and fit |
Sustainability in Nail Care
As the beauty industry becomes more conscious of its environmental impact, nail care is no exception. The future of nail tips will likely focus on sustainable materials and practices, such as eco-friendly nail polish and biodegradable nail tips. By adopting these practices, individuals can reduce their carbon footprint while maintaining their beauty standards.
In conclusion, the future of nail tips is full of exciting possibilities, from emerging trends and technologies to sustainable practices. By staying informed and adapting to these changes, beauty enthusiasts can achieve the perfect nail care look while contributing to a more environmentally conscious industry.